Step 4: Add Pages and Customise Your Website
By now, you should’ve successfully set up a WordPress site – the foundation of your site has been built, and now it’s time to really start fleshing it out.
The first step is to build out the pages that you’re going to need the most. We’ve thrown together a list of the most popular pages most business websites have:
- Homepage
- About us
- Contact page – here, you can add your social links (Facebook page, Twitter, etc.)
- Our services/products
- Blog
- Gallery
- Testimonials/reviews
- Frequently asked questions
If you’re unsure what your website should include, read this article about the 12 critical elements that every site needs.
Once you’ve decided on your pages, it’s time to start adding them to your website. For this, you’ll also need to set up a navigation system for your site.
Part 1. Add new pages in WordPress
A blank website without any pages or content isn’t of much use to anybody, so in order to make the website accessible and interesting, we need to add some pages and blog posts.
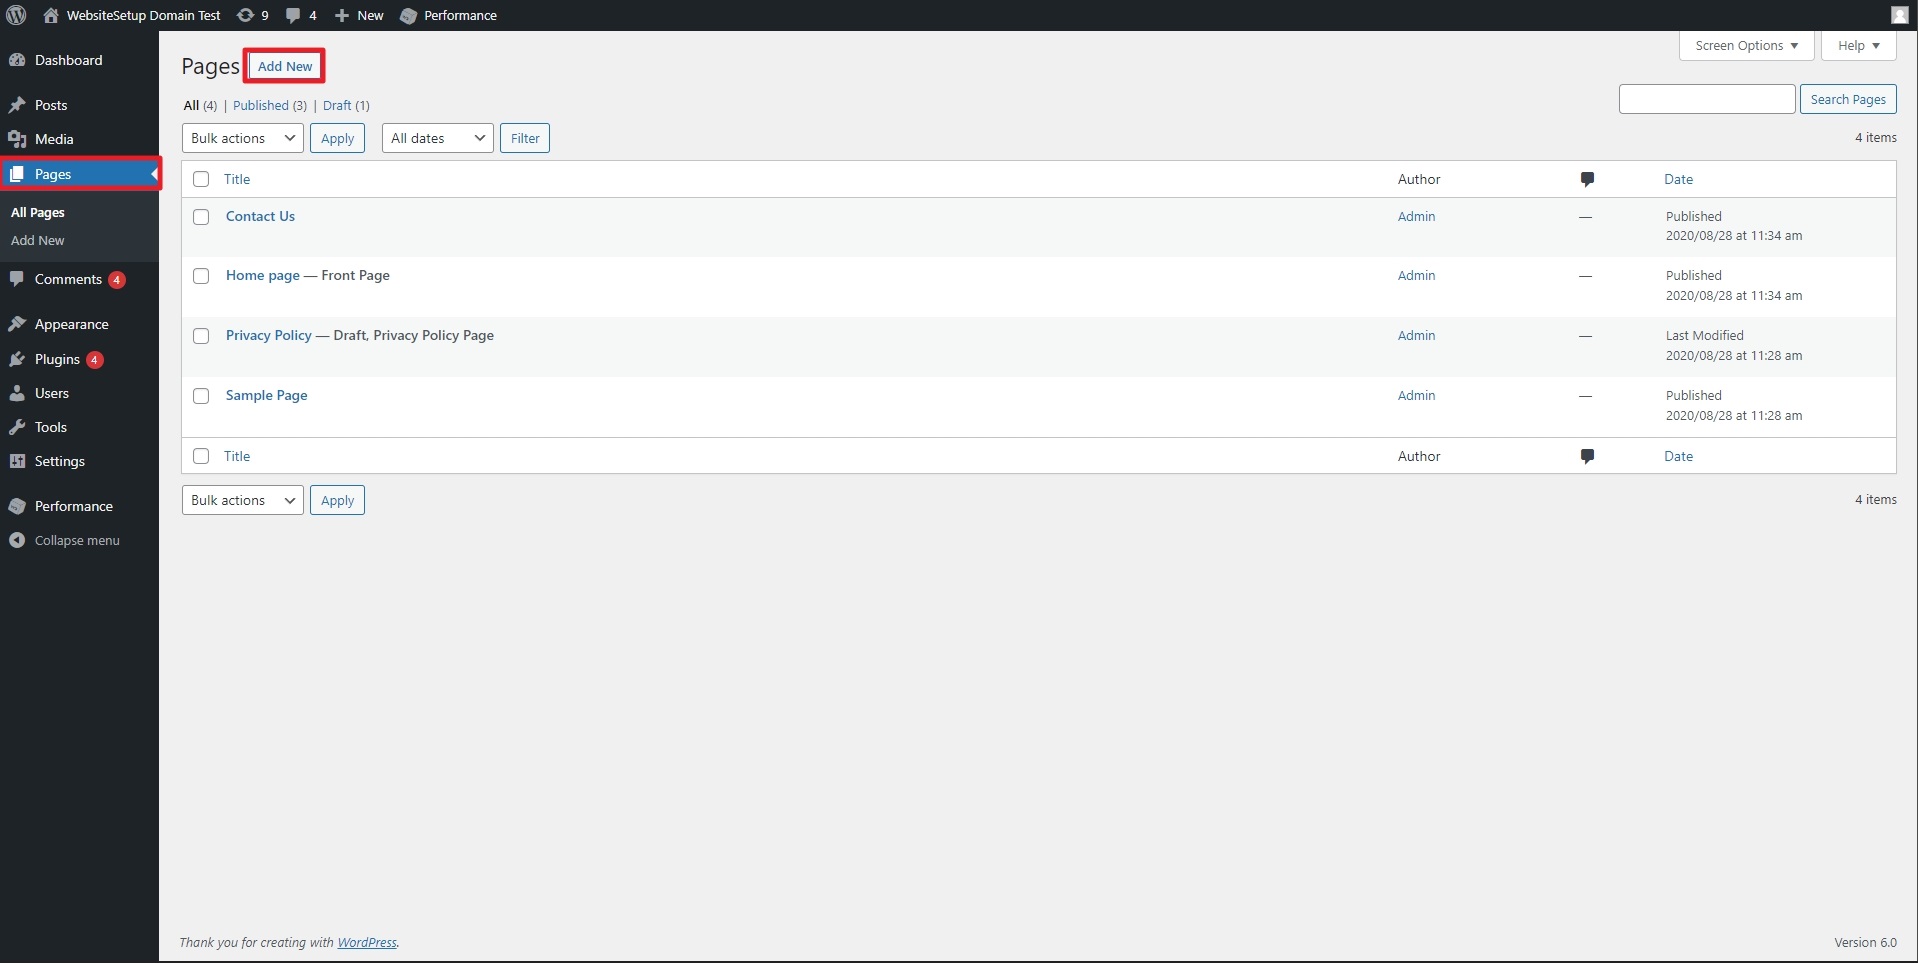
To add pages to your WordPress site, navigate the left-hand menu to “Pages”, and from there click the button “Add New”.
This will take you to the WordPress block editor – also called the Gutenberg Editor.
If it’s your first time visiting this, then it will display a quick step-by-step tutorial on how it works and where certain functions are located.
It’s quite easy to work; everything is block-based, which means if you want to add something to your page, you simply need to choose the correct “block” from the menu and fill it in.
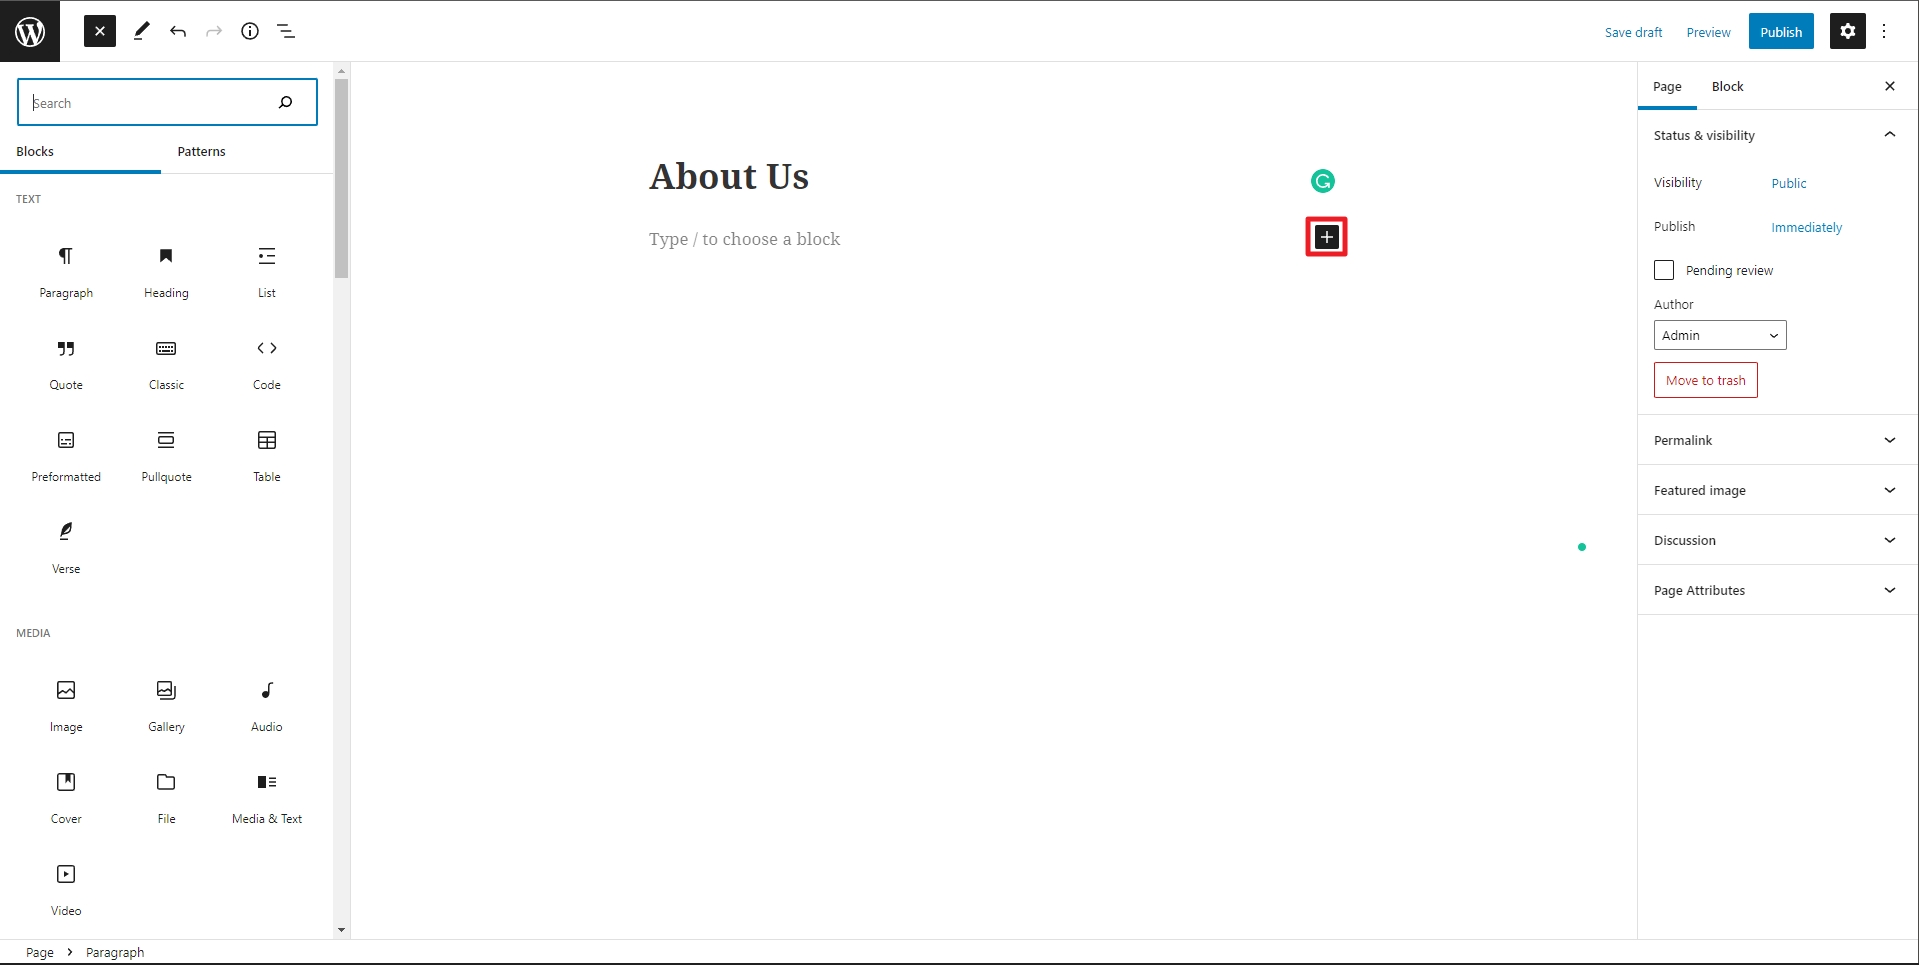
On the left, in the content block section, there are multiple content options to choose from. Each serves a different purpose and adds a different visual element to the page.
Alternatively, the right-hand menu allows you to change some page-wide settings, like the author, the page’s permalink (URL), the featured image, and more.
Or on the top of the right-hand menu, you can click on the “Block” tab and customise the settings for each of the blocks you’ve selected on the page.
Once you’re happy with the page, you can either choose to make it public or private. The former will make the content visible to any visitor, while the latter means that it is only visible to you via your website dashboard – this is a useful option to use when still working on a particular page.
There’s also an option to preview the changes you’ve made or to schedule a date and time for the page to be published.
Part 2. Organise your website navigation
Now that you’ve created the pages, you need time to add them to the navigation bar.
This is the menu located throughout your website that provides visitors with access to the rest of the content.
To customise your navigation system, click the “Appearance” tab on the left-hand column followed by “Menus”.
The name of the menu doesn’t matter since this is only visible to you, but be sure to tick the box stating that this is your primary menu.
After you’ve created the menu, you can start adding and organising the pages there.
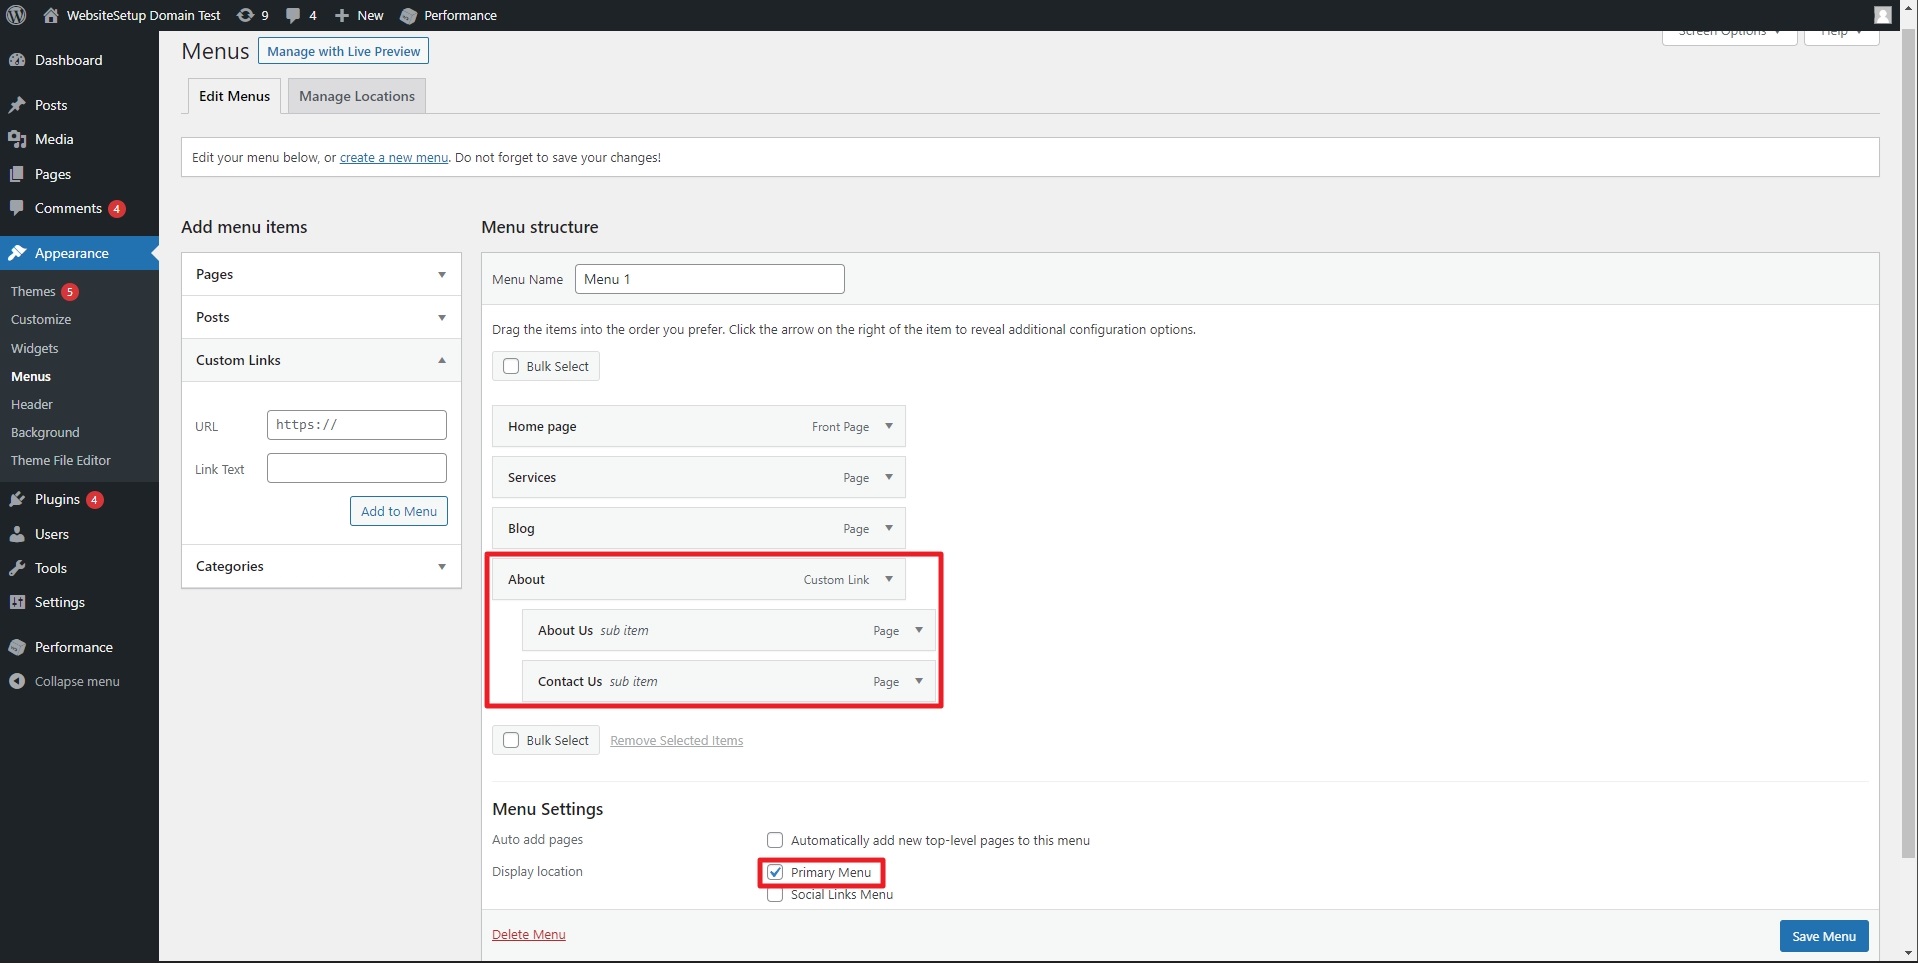
You can also create sub-items, meaning that pages will be revealed when a user hovers their mouse over them.
For example, here, we’ve done that by adding “About Us” and “Contact Us” under the “About” category.
Part 3. Change/Add new themes and layouts
To customise your site, navigate to your WordPress dashboard and select “Appearance” from the left-hand menu.
Here, you can tweak your website’s theme, add and change widgets, customise your menu’s structure, and so on.
Essentially, every change that you want to make on your website can be done through the “Appearance” tab.
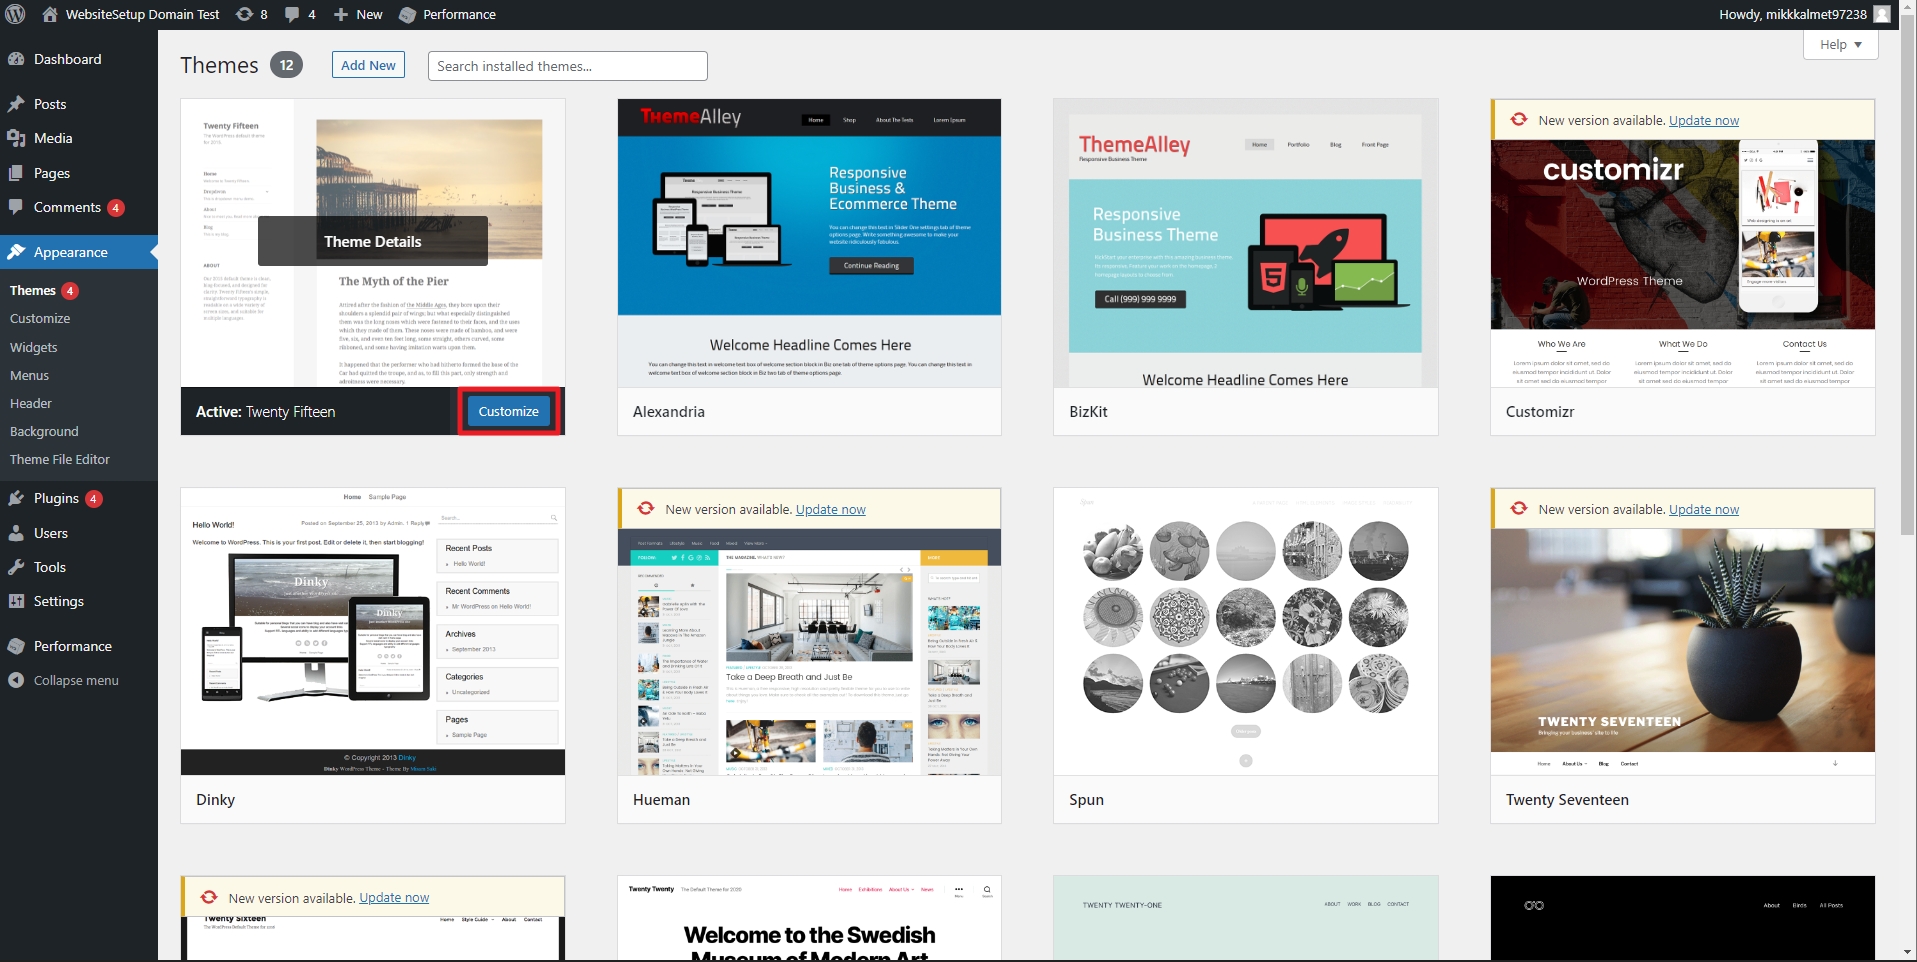
Also, if you feel comfortable with coding, you can even add custom CSS to fully personalise your site.
Part 4. Adding blog posts (optional)
While adding a blog is optional, creating one is often a good idea. It provides a channel in which to publish fresh content, demonstrate your professional expertise, and provide additional value to your website’s visitors.
It’s also a good idea to have a dedicated blog page and keep your homepage static.
To do that, create an empty page (Pages > Add New), name it “Blog” (or a suitable alternative – “Blog” makes sense because it will automatically create the address: yoursite.com/blog), and publish it.
Then, pick it as your “Posts Page” either under Appearance > Customise > Homepage Settings, or under Settings > Reading.
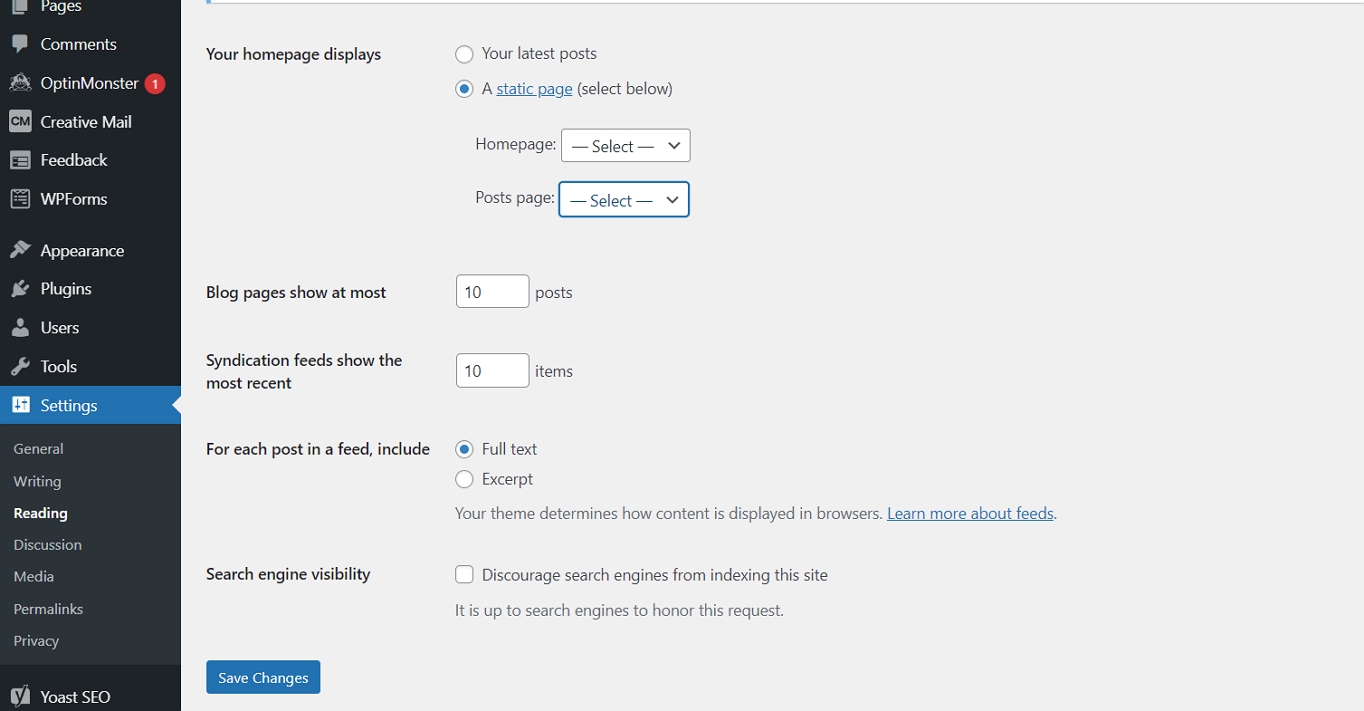
Your chosen page will automatically display all blog posts when you save them – be sure to include the page in your navigation menu.
Once set up, you can start creating your blog posts. This can be done via “Posts” and “Add New”.
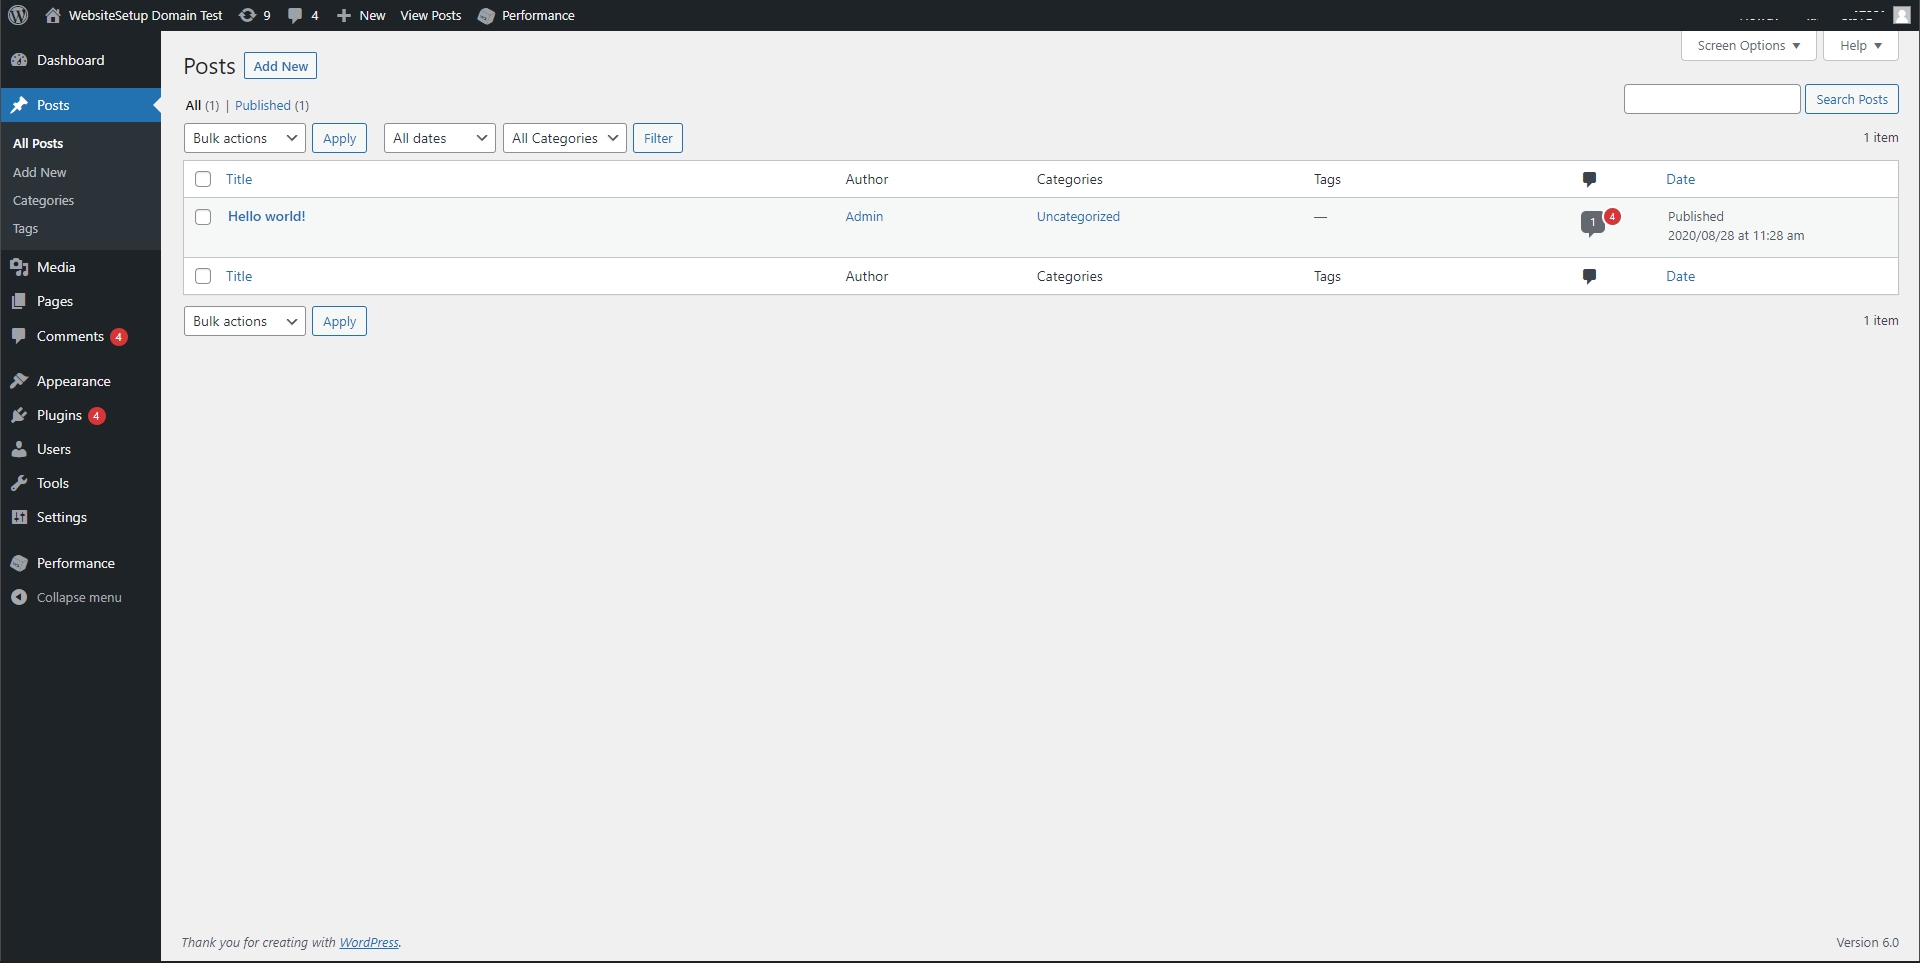
After you click “Add New”, you’ll be redirected to the editor page where you can start writing and customising your content.
Add images, writing, a title, and anything else needed for the blog post. In the right-hand sidebar, you’ll also find options to apply categories and tags, define an excerpt, and set up a featured image – these functions improve your page’s discoverability and categorisation.
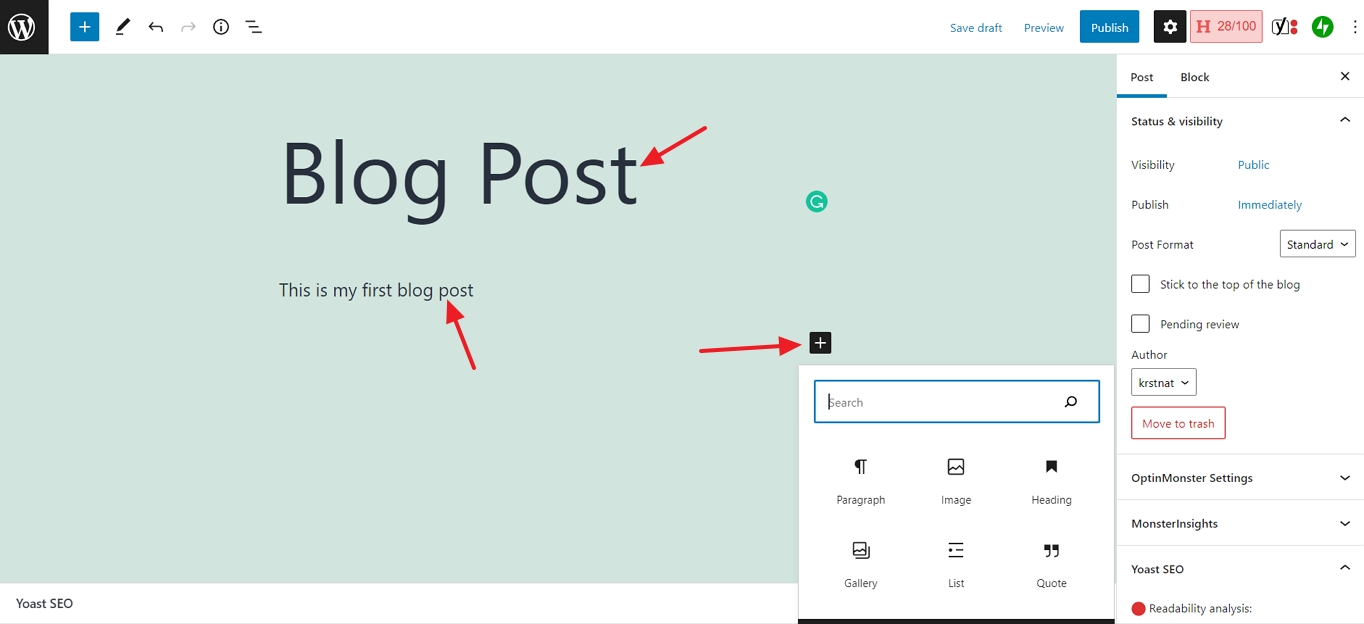
Once you’re done, click “Publish”, and your post will appear under the dedicated blog page.

