Step 3: Set up WordPress website through web hosting
If you used Domain.com for WordPress hosting, you can follow this step-by-step guide to set it up.
If you used Bluehost, you need to first log in and you you should a page like the following:

Now, all you have to do is click the “Create your website” button.
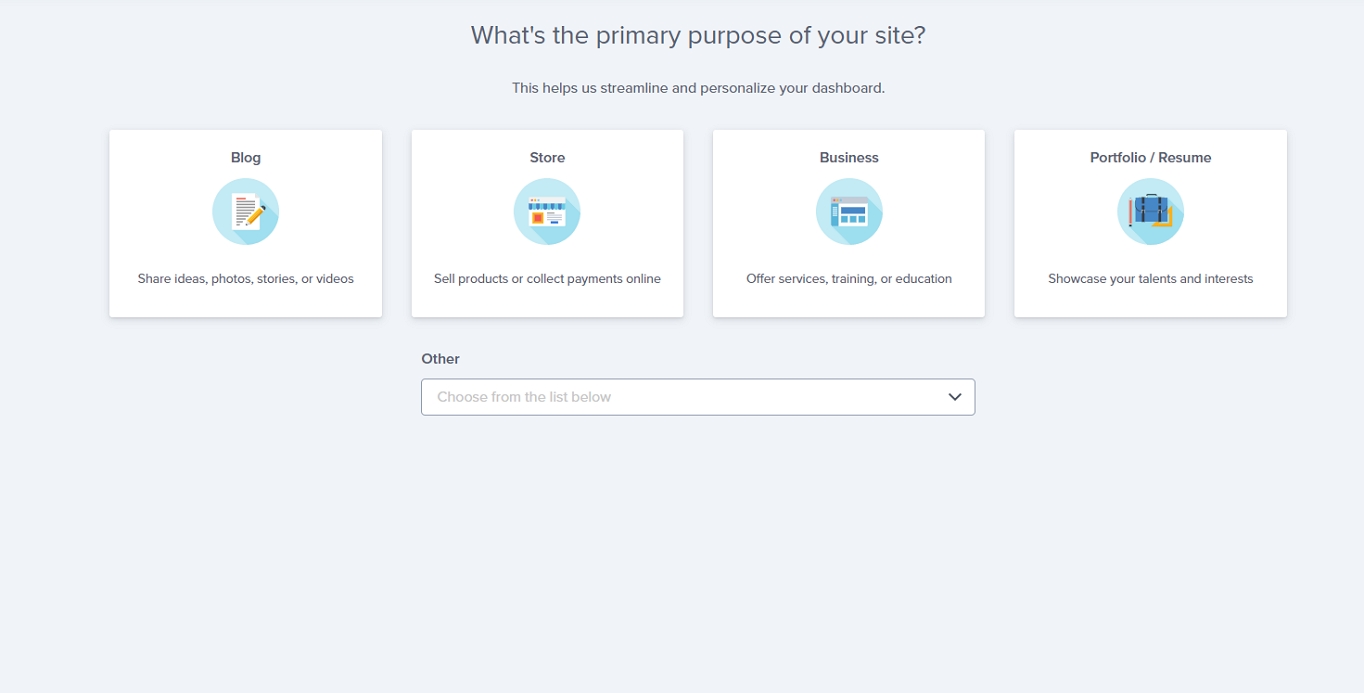
The next step is to decide the purpose of your site.
You can choose between Blog, Store, Business website, or Portfolio site/Resume. If those don’t quite fit your vision, you can select an option in the “Other” dropdown list.
Next up is to choose how you’d like to build your website. Bluehost offers two options: using Bluehost’s own website builder, or WordPress.
Since we want to focus on theme-based site building, we have chosen the latter.
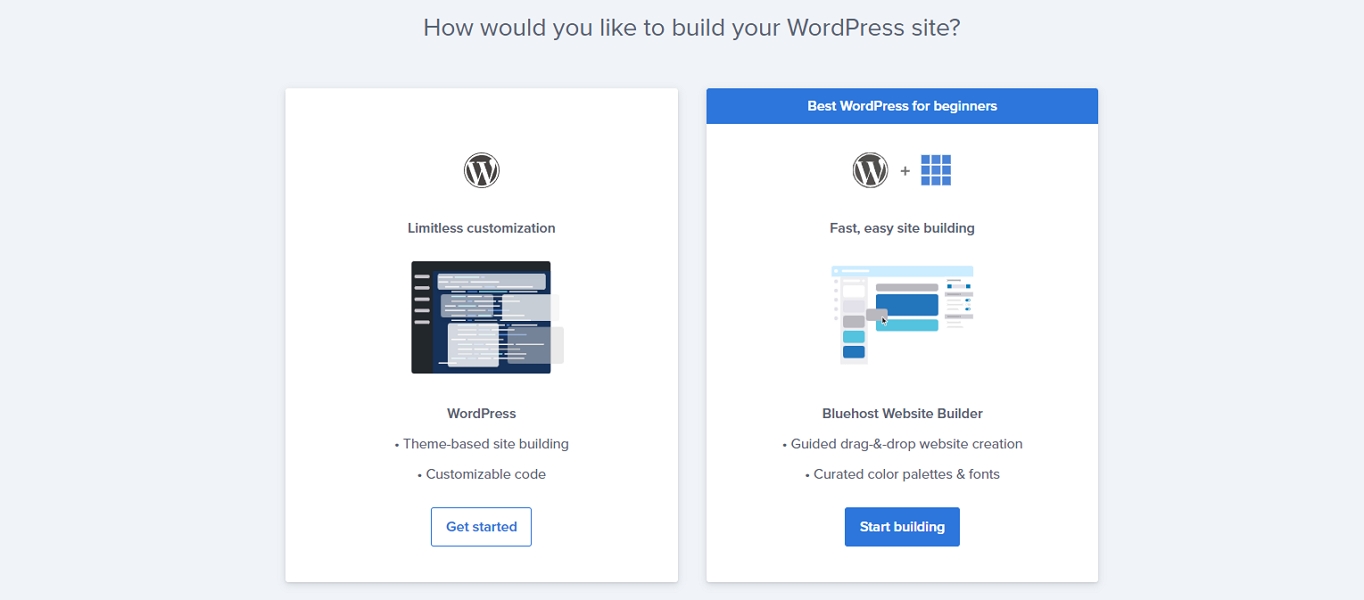
Click “Get started” and your WordPress installation process starts.
Once the installation is completed, you need to log in to your WordPress dashboard.
Right now, what’s important for us is to start customizing the new WordPress site and for all you need to do is click on the “Customise site” button.
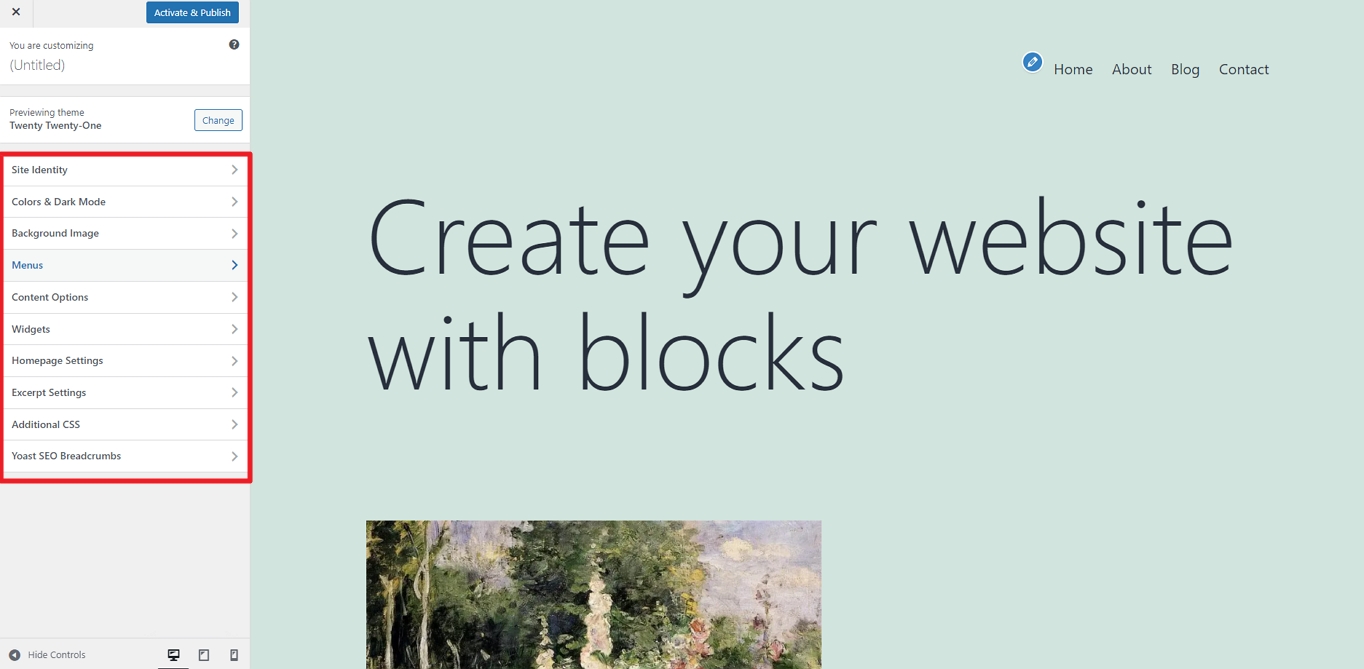
On the left sidebar, you’ll see options that will allow you to modify your website’s design, such as:
- Title and tagline
- Site logo
- Fonts
- Colors
- Widgets (sidebar)
- Background image, and more…
Note: the options that appear will vary depending on which theme you’ve installed.
We recommend playing around with the drag-and-drop editor and experimenting with different fonts and colour schemes to hone your desired aesthetic.
Once you’ve tweaked your site’s design to perfection, it’s time to move on to pages and content.